Transforming Your Terminal Experience for Enhanced Productivity, Speed, and Aesthetics
Supercharge your productivity by transforming your terminal experience for enhanced productivity, speed, and aesthetics.
In this article, we’ll show you how to transform your terminal into a productivity, speedy and visually appealing one. We’ll cover everything from changing your shell to installing themes, plugins, and fonts. By the end of this guide, you’ll have a sleek, efficient, and personalized terminal that matches your workflow.
Step 1: Checking Your Current Shell
First things first, let’s identify your currently activated shell. Open your terminal and execute either of the following commands:
echo $SHELL
or
echo $0
The output will reveal your currently active shell. Additionally, you can list all available shells using the following command:
cat /etc/shells
Follow the below steps to setup & configure the Terminal
In this article, we consider the Bash terminal that will available in Linux and macOS.
Step 2: Switching to Zsh
Install Zsh Shell
Zsh is a powerful alternative to the default Bash shell. Its versatility and customization options make it a popular choice among developers. To install Zsh, follow the steps based on your operating system:
< /etc/shells grep zsh
outout:
/bin/zsh
/usr/bin/zsh
Installation
- For Debian(ubuntu like distros)
sudo apt update
sudo apt install zsh- For Redhat
sudo yum install zsh- For OpenSuse
zypper install zsh- For Arc Linux or Manjaro
pacman -S zsh- For Fedora
dnf install zsh- For free bsd
pkg install zsh- For macOS
brew install zshor you can download it from source http://zsh.sourceforge.net/Arc/source.html
Official Installation Doc: https://github.com/ohmyzsh/ohmyzsh/wiki/Installing-ZSH
Check zsh version: zsh --version
Zsh has been installed successfully.
Now, make zsh as default terminal:
chsh -s $(which zsh)If you want to switch back to the default bash or any other terminal, then run the below command.
chsh -s /bin/bash or exec bash
or
chsh -s /bin/zsh or exec zsh
You need to rester your shell to activate the zsh plugin.
Step 3: Installing Oh My Zsh
Oh My Zsh is beautiful framework for managing Zsh configurations. To install it, use either of the following methods:
Install oh my zsh
Oh my zsh is an open-source framework for managing Zsh configuration.
Install via Curl
sh -c "$(curl -fsSL https://raw.github.com/ohmyzsh/ohmyzsh/master/tools/install.sh)"Install via wget
sh -c "$(wget https://raw.github.com/ohmyzsh/ohmyzsh/master/tools/install.sh -O -)"Manual Installation
curl -Lo install.sh https://raw.githubusercontent.com/ohmyzsh/ohmyzsh/master/tools/install.shEdit your .zshrc file to ensure the Zsh configuration variable is set to Oh My Zsh:
Open zshrc file: > sudo nano ~/.zshrc
export ZSH="$HOME/.oh-my-zsh"
Make sure the above variable is set inside the zshrc file. If it’s not there then edit the file and add the above line.
Reload your configuration by running
source ~/.zshrc.
Step 4: Exploring Themes
The appearance of your terminal can greatly impact your workflow. Oh My Zsh comes with a variety of themes to choose from. Some popular options are robbyrussell and agnoster. To set a theme, edit your .zshrc file:
For Robby Russell theme:
ZSH_THEME="robbyrussell"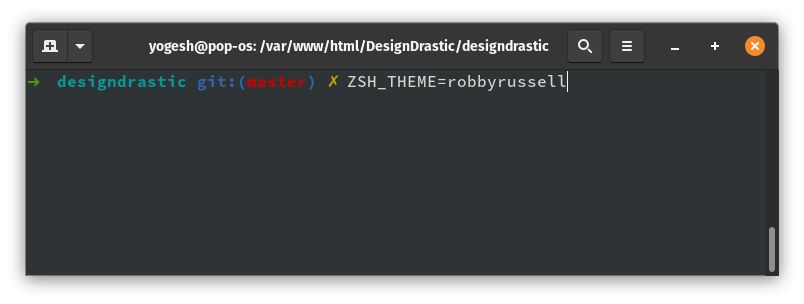
For Agnoster theme:
ZSH_THEME="agnoster"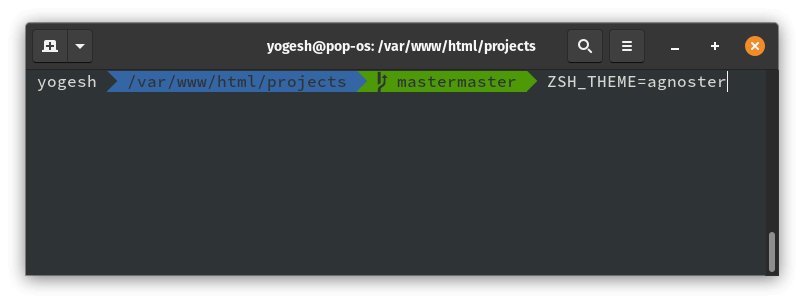
Check out the full list of Oh My Zsh themes on their GitHub page. You can also explore external themes like Powerlevel10k or Spaceship.
Some of the popular themes are Powerlevel10k, Powerlevel9k, Spaceship, Bullet-Train, etc…
Powerlevel10k
Powerlvel10k is a fully customizable and more advanced theme of zsh.
Installation
For Oh my zsh
git clone --depth=1 https://github.com/romkatv/powerlevel10k.git ${ZSH_CUSTOM:-$HOME/.oh-my-zsh/custom}/themes/powerlevel10kthen, add set the theme in ZSH_THME variable in .zshrc file.
ZSH_THEME="powerlevel10k/powerlevel10k"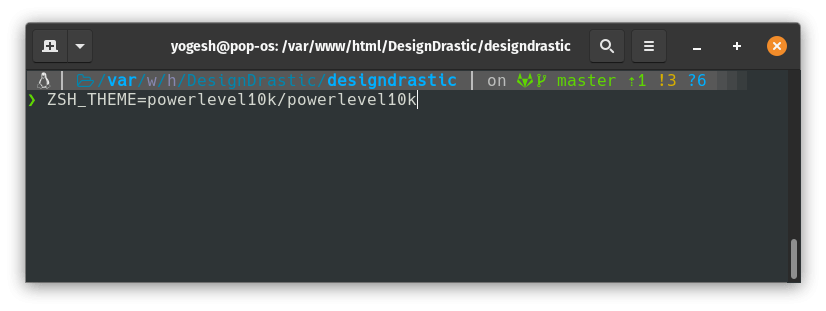
Configure Powerlevel10k
Type command: p10 configure to start Powerlevel10k configuration.
Or also you can edit the configuration file: ~/.p10k.zsh
For more details: https://github.com/romkatv/powerlevel10k
Spaceship
Another powerful theme is Spaceship. It comes with many features and an extremely customizable zsh prompt theme.
Installation
For Oh My Zsh
git clone https://github.com/denysdovhan/spaceship-prompt.git "$ZSH_CUSTOM/themes/spaceship-prompt" --depth=1Symlink spaceship.zsh-theme to your oh-my-zsh custom themes directory:
ln -s "$ZSH_CUSTOM/themes/spaceship-prompt/spaceship.zsh-theme" "$ZSH_CUSTOM/themes/spaceship.zsh-theme"Then set the ZSH_THEME variable in .zshrc
ZSH_THEME="spaceship"
For more details: https://denysdovhan.com/spaceship-prompt/
Step 5: Plugins
Oh My Zsh supports a wide range of plugins to boost your productivity. To activate plugins, add them to the plugins array in your .zshrc file:
plugins=(git node autojump ... )zsh-autosuggestions
For Oh-My-Zsh
First, clone the directory using git
git clone https://github.com/zsh-users/zsh-autosuggestions ${ZSH_CUSTOM:-~/.oh-my-zsh/custom}/plugins/zsh-autosuggestionsand activate the plugin
plugins=(... zsh-autosuggestions)Or Manual Installation
git clone https://github.com/zsh-users/zsh-autosuggestions ~/.zsh/zsh-autosuggestionsand add the following line to ~/.zshrc
source ~/.zsh/zsh-autosuggestions/zsh-autosuggestions.zshand restart the terminal.
zsh-syntax-highlighting Installation
For Zsh
Clone the git repo
git clone https://github.com/zsh-users/zsh-syntax-highlighting.git
echo "source ${(q-)PWD}/zsh-syntax-highlighting/zsh-syntax-highlighting.zsh" >> ${ZDOTDIR:-$HOME}/.zshrc
Then enable the plugin
source ./zsh-syntax-highlighting/zsh-syntax-highlighting.zshFor Oh-My-Zsh
Clone the repo
git clone https://github.com/zsh-users/zsh-syntax-highlighting.git ${ZSH_CUSTOM:-~/.oh-my-zsh/custom}/plugins/zsh-syntax-highlightingAnd add the zsh-syntax-highlighting value in plugins variable
plugins=(... zsh-syntax-highlighting)And restart the terminal.
Before


After


z or Zsh-z
Z allows you to jump quickly to the directory that you visited most in the past. Z will remember the path you’ve entered frequently and helped you to jump around them with few keystrokes.
Z uses regular expression.
To enable z plugin, assing z to your plugin variable.
plugins=(... z )
For more oh-my-zsh plugins: https://github.com/ohmyzsh/ohmyzsh/wiki/Plugins
Step 6: Fonts and Colors
Enhance readability and visual appeal by installing patched fonts for your terminal. Powerline fonts, such as Fira Mono or Hack, are popular choices. Additionally, you can customize colors using built-in schemes like Tango or Solarized.
Install Powerline fonts
sudo apt-get install fonts-powerlineFor more options: https://github.com/powerline/fonts#quick-installation
Download and Install the Powerline/Nerd font
Then select the preferable front in custom font inside the text tab in Preferences.
Change the colors(color scheme) of the Terminal Open the preferences and select the second tab => Colors.
Available Buil-in Schemes are: Tango & Solarized are recommended.
You can also customize the colors according to your preference in the custom tab.
Additionally: Supercharge with Starship Starship is a blazing-fast, customizable prompt for any shell. Installation is straightforward:
Installation Using curl
curl -fsSL https://starship.rs/install.sh | bashWith Brew
brew install starshipWith Scoop
scoop install starshipAfter installation, add the below line to init the Starship
For Bash(~/.bashrc)
eval "$(starship init bash)"For Zsh(~/.zshrc)
eval "$(starship init zsh)"For Fish(~/.config/fish/config.fish)
starship init fish | sourceConfiguration Starship uses Ta OML file for configuration.
TOML Doc: https://github.com/toml-lang/toml
To get started configuring starship, create the config file starship.toml inside .config direcotry.
starship.toml
add_newline = false
symbol = "➜"
[language]
symbol='*'
.
.
.
For prompt configuration visit: https://starship.rs/config/#prompt
Other options(tmux, tilix, etc..)…
If you want to take your terminal multitasking to the next level, consider using tools like Tmux or Tilix. These tools allow you to split your terminal window into multiple panes, enhancing your efficiency.

Congratulations! You’ve transformed your terminal into a sleek and powerful tool that matches your workflow. With a customized shell, themes, plugins, and fonts, you’re ready to take on any coding task with enhanced productivity.
Thanks for reading!